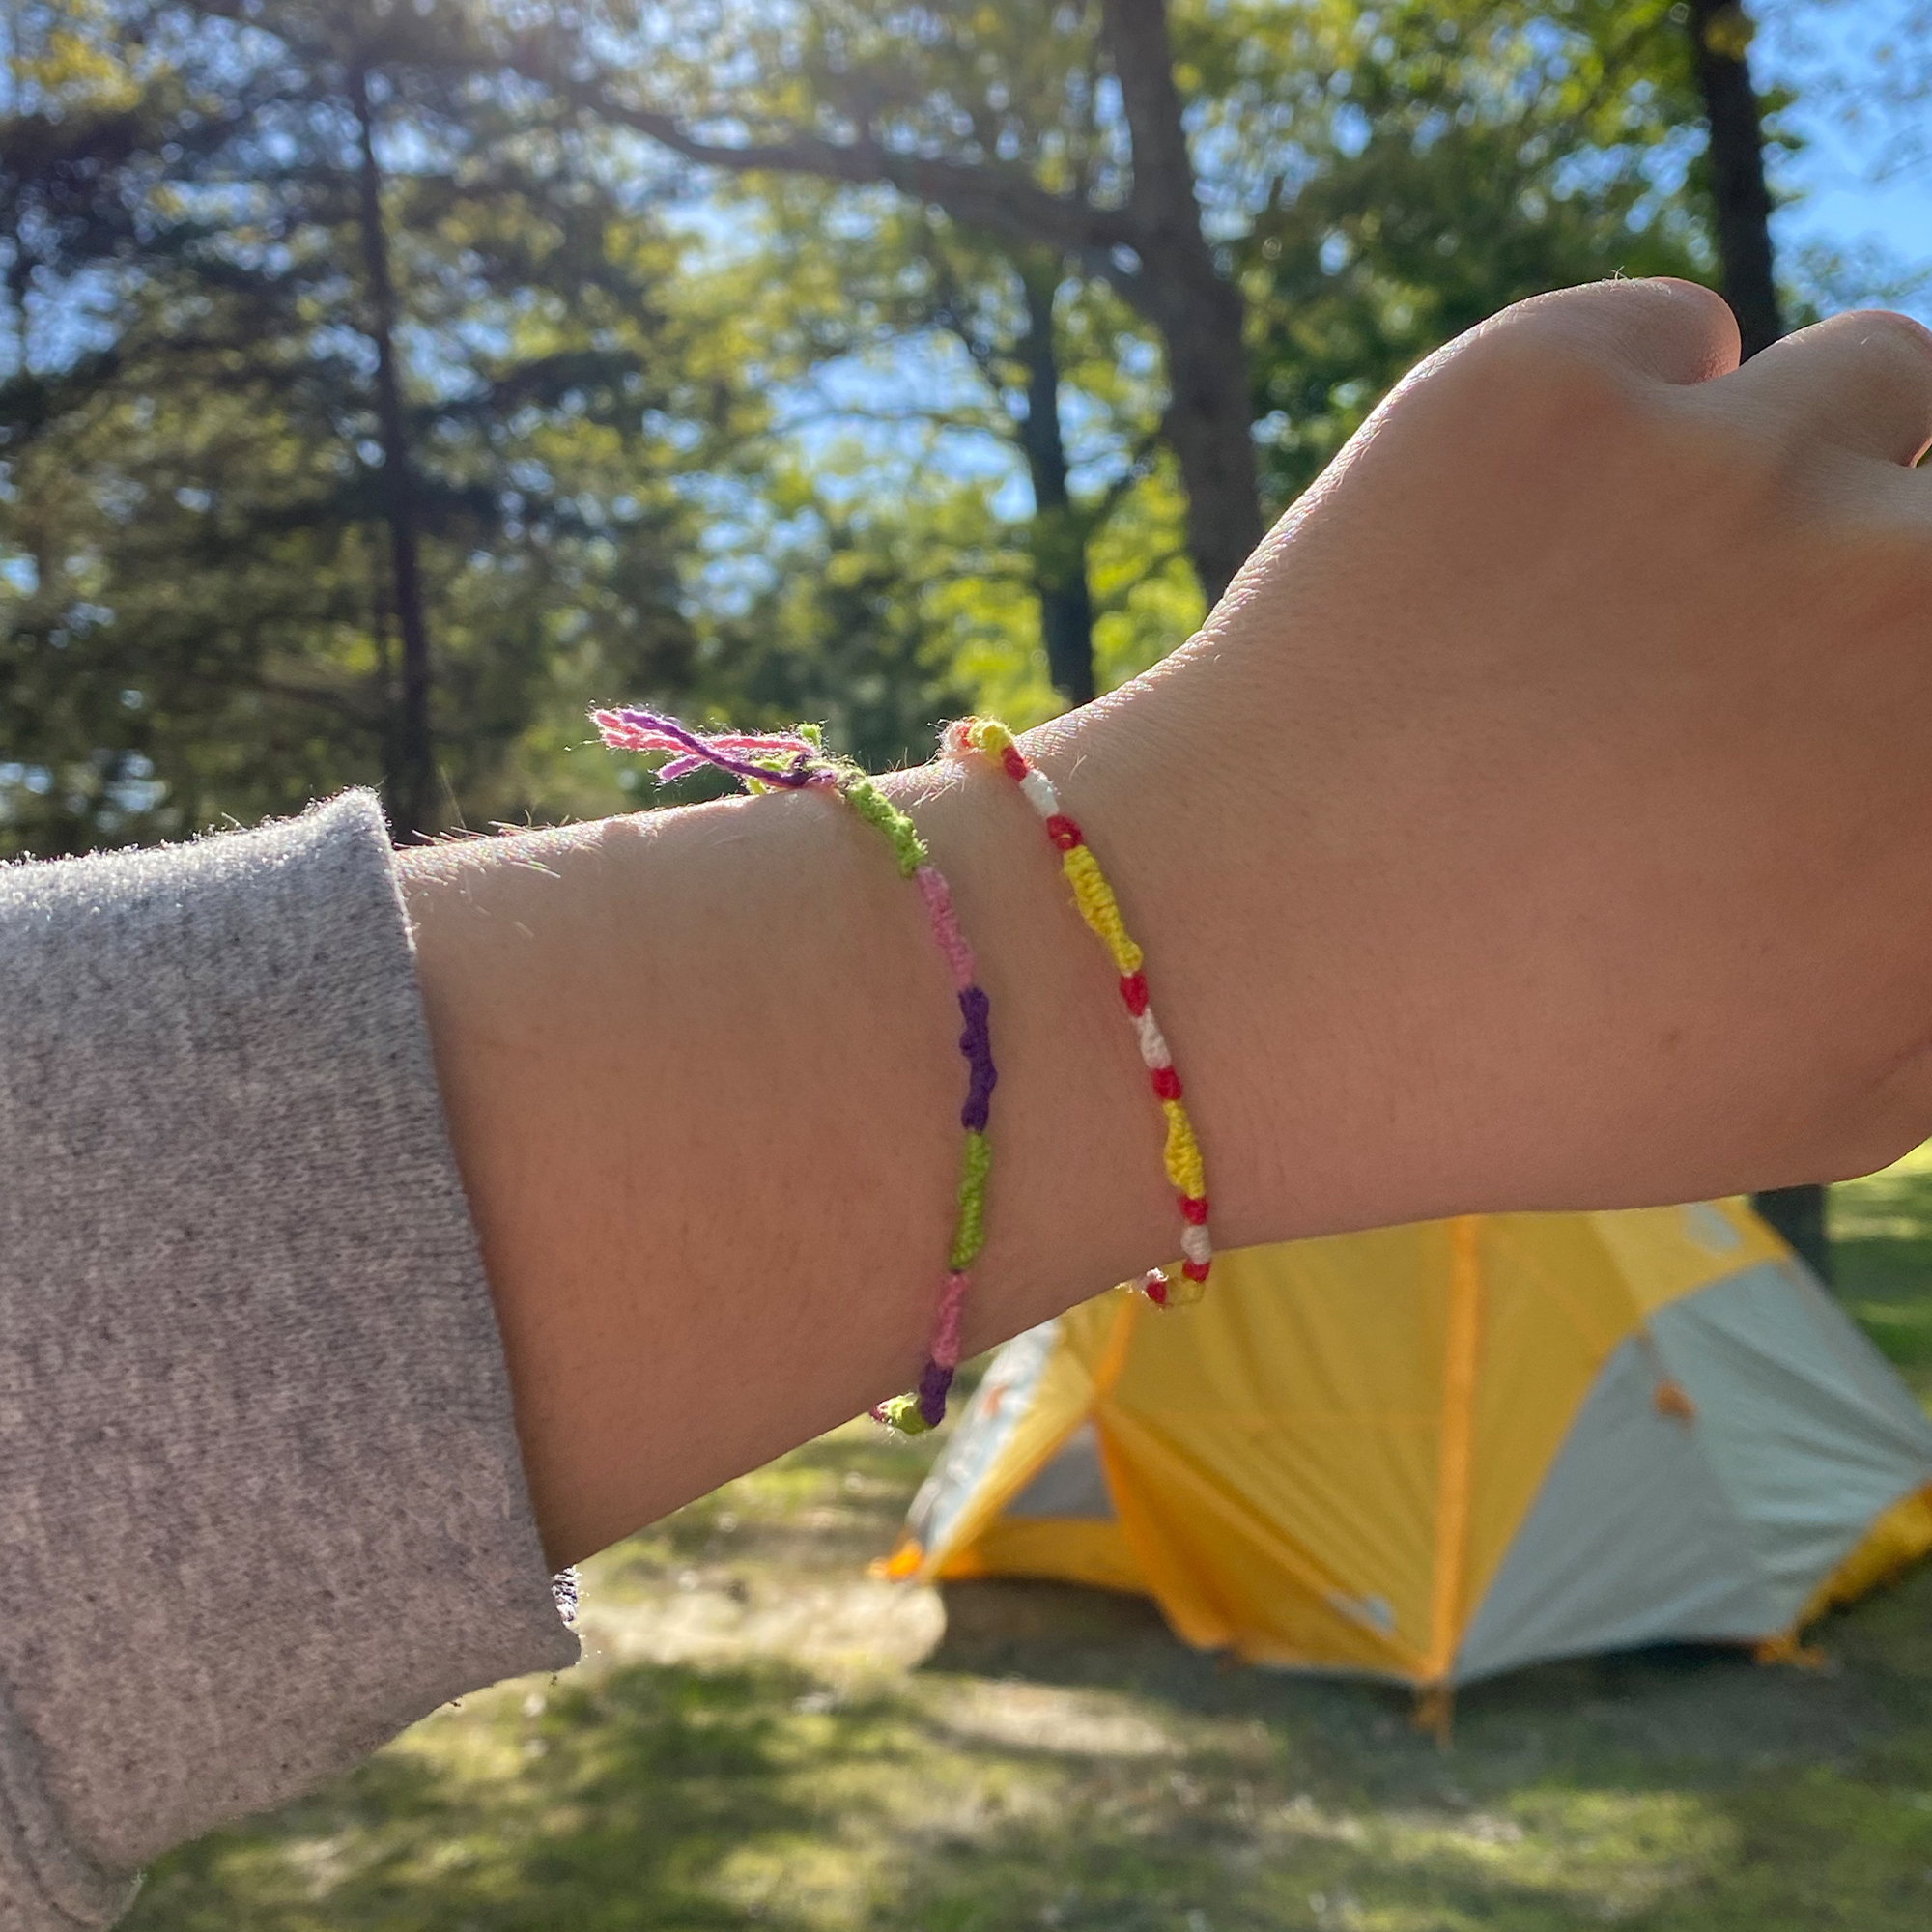
This is a classic skill every kid and camper should know — how to make a traditional colored string friendship bracelet. The kind you make for your pals and tie on each other and wear all season long. SpongeBob and Patrick fans can follow their fave characters’ colorways to make themed bracelets.
What You’ll Need:
- tape
- scissors
- three colors of embroidery floss (red/yellow/white for a SpongeBob-themed bracelet, green/purple/pink for a Patrick-themed bracelet)
How To Make:
Step 1: Cut 10-inch strings of each color.
Step 2: Tie a knot five-inches from the end, and tape it to a flat surface.
Step 3: Pull the first string to the left, laying it over the other two strings to create a loop that looks like a backwards “4.”
Step 4: Tuck string behind the other two and pull through gently to make a knot. Be sure to draw the string up as you pull so that the knot moves up to the top of the bracelet. It should be taut.
Step 5: Continue steps 3+4 with the same color string until you have the desired length of this color.
Step 6: Repeat with the next color string. Alternate all three colors until you have knotted enough to wrap around your wrist.
Step 7: Finish the bracelet by tying another knot at the end. Pull tight.
Step 8: Trim and tie onto your wrist or give it to a pal.


