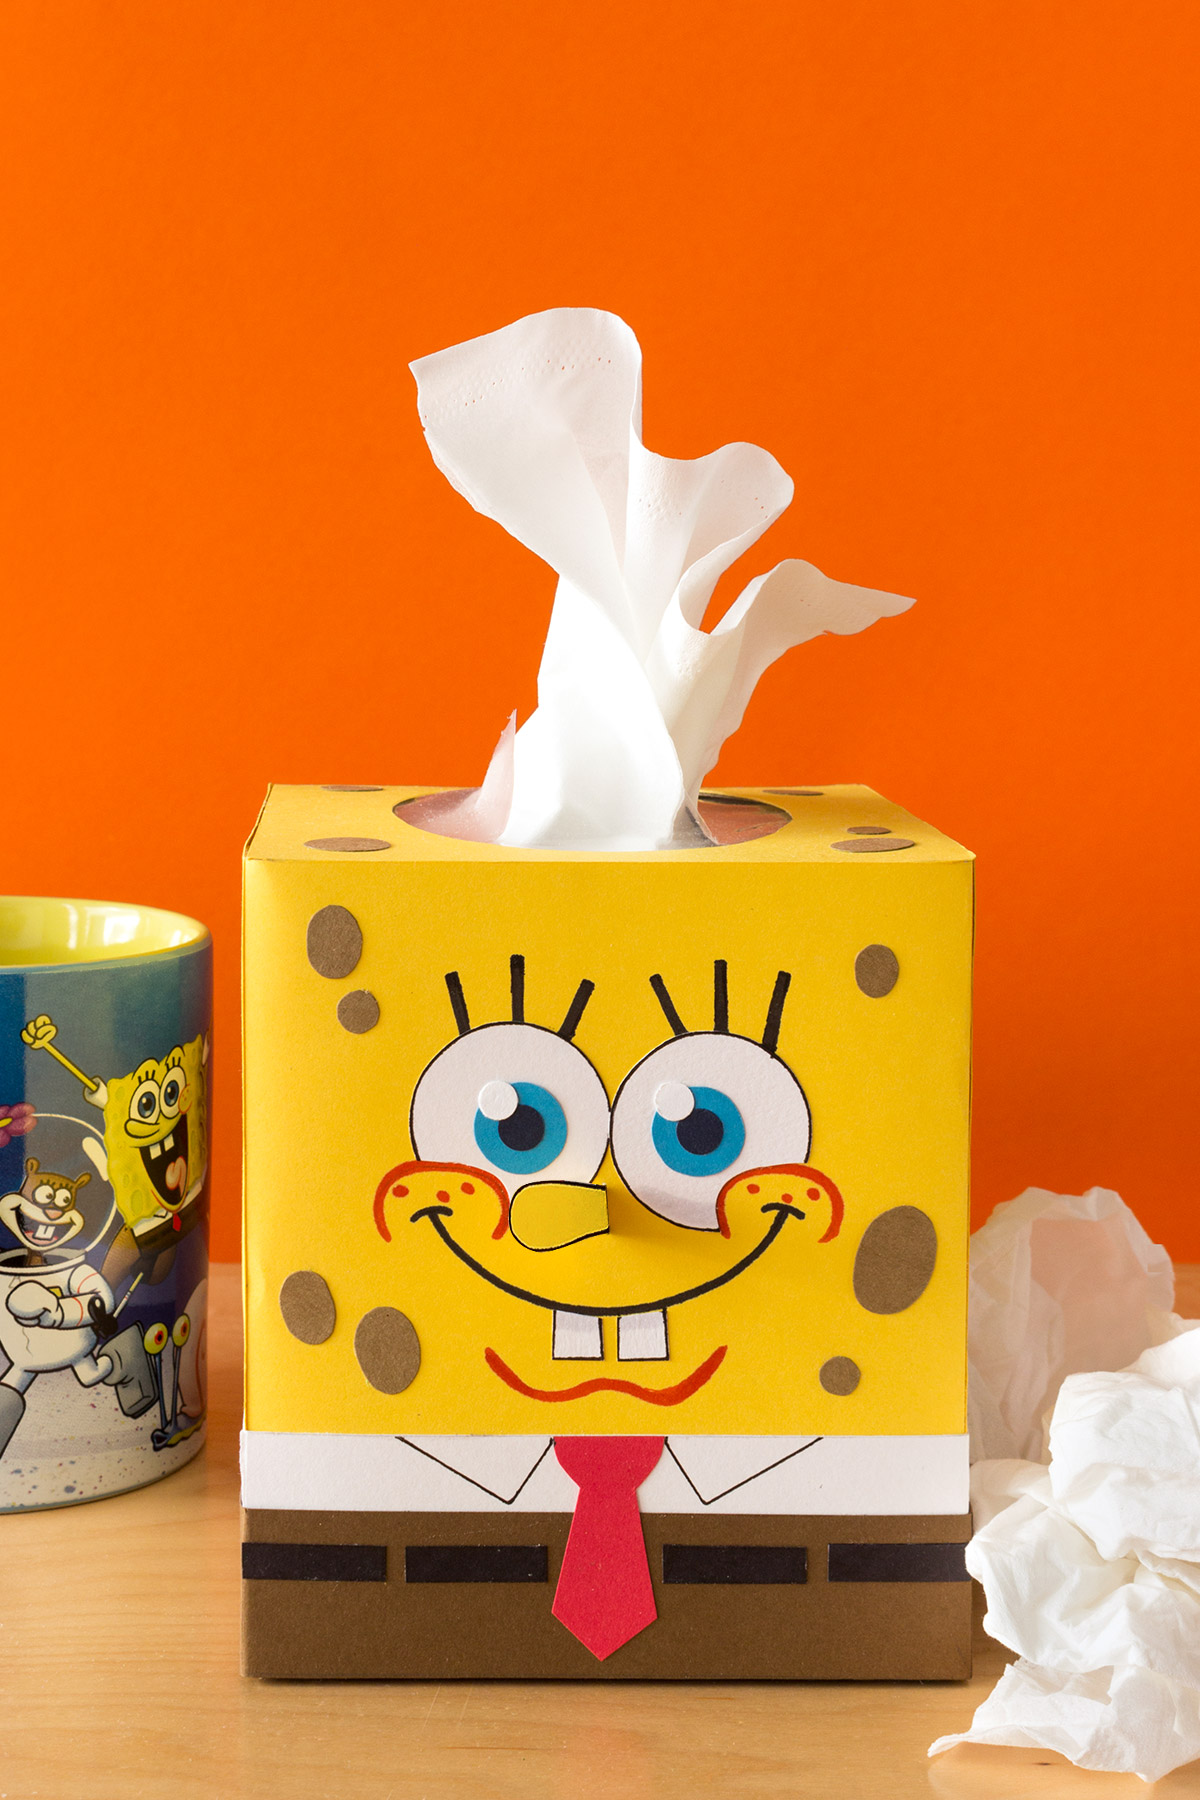
Beat the winter sniffles with this hilariously charming SpongeBob tissue box craft:
What You’ll Need
Cube-shaped tissue box
Yellow, white, dark and light brown, red, blue paper
Glue stick
Black pen
Scissors (substitute crafting knife)
Hole puncher (optional)
How to Make
Step One: Pop out the oval top of the tissue box.
Step Two: Trace the oval top on a yellow piece of paper and cut it out. Lay the rest of the sheet of paper on the top of the box and trim around the edges so the paper fits perfectly on the top surface. Glue it down.
Step Two: Cut yellow paper to fit and glue down on remaining sides of the box.
Step Three: For SpongeBob’s shirt, cut a white paper band that wraps all the way around the box, using the photo for reference.
Step Four: For SpongeBob’s pants, cut a brown paper band that wraps all the way around the box, using the photo for reference.
Step Five: Use a large glue stick lid to trace SpongeBob’s eyes onto white paper.
Step Six: Find household objects to trace circles for SpongeBob’s irises, pupils and eye highlight. For example, I used a a pencil tip eraser for the pupil and a hole puncher circle for the highlight.
Step Seven: Cut out two white squares for his teeth and cut out his red tie. Glue all cut-out features to the box, using the photo for reference.
Step Eight: Draw SpongeBob’s mouth, cheeks, eyelashes and cheeks directing onto the box.
Step Nine: Cut SpongeBob’s nose out of yellow paper and leave a small tab at the base to fold back. Glue the tab down in between SpongeBob’s eyes so the nose sticks out at a 45-degree angle.
Step Ten: For SpongeBob’s belt, cut small rectangles out of black paper and glue them in a line around SpongeBob’s pants, leaving space in between each rectangle.
Step Eleven: For SpongeBob’s porous holes, cut different-sized ovals out of brown paper and glue them on all over the yellow part of the cube.
Step Twelve: Once dry, gently pull out the first tissue!
Ah-choo! Don’t worry, SpongeBob’s got you 🙂


